ddos 방어 apache
- 프로그래밍/서버(리눅스,centos)
- 2021. 10. 1.
참고
https://phoenixnap.com/kb/apache-mod-evasive
Step 1: Install Apache Web Server Utility
Before installing the utility, update the package repository with the command for your Linux distribution:
Debian / Ubuntu:
sudo apt update
RedHat / CentOS:
sudo yum update
Allow the system to refresh and update your software listings.
Then, install a helper utility:
Debian / Ubuntu:
sudo apt install apache2-utils

RedHat / CentOS:
sudo yum install httpd-devel
The final section of the output looks like this:

This utility is required for the installation of mod_evasive.
Step 2: Install mod_evasive
Debian / Ubuntu
To install the mod_evasive module on Debian / Ubuntu, enter the following:
sudo apt install libapache2-mod-evasive

When you get a prompt, select Ok and choose your configuration.
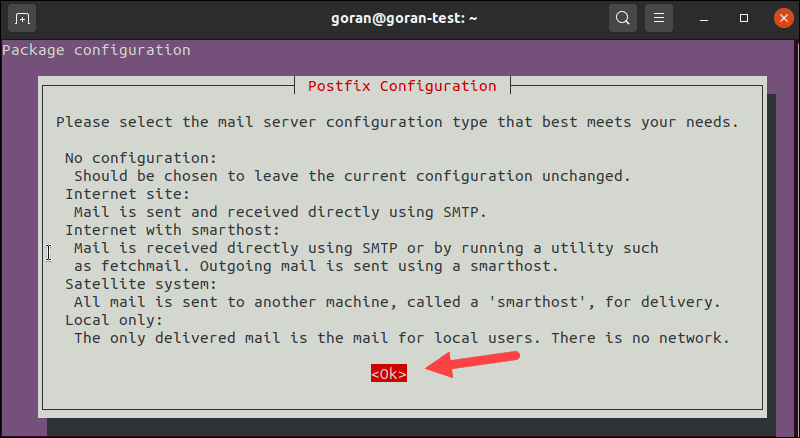
When unsure, select No configuration or Local only.
CentOS / RedHat
To install the mod_evasive module on RedHat / CentOS:
Add the EPEL repository:
sudo yum install epel-release

And then, enter:
sudo yum install mod_evasive
Allow the process to complete.
Step 3: Configure mod_evasive
Like most Linux software packages, mod_evasive is controlled by a configuration file. Make the following changes in the config file as the first step in preventing DDoS attacks:
1. Use a text editor of your choice with the following commands:
Debian / Ubuntu:
sudo nano /etc/apache2/mods-enabled/evasive.conf
RedHat / CentOS:
sudo nano /etc/httpd/conf.d/mod_evasive.conf
2. Find the following entry:
#DOSEmailNotify you@yourdomain.com

Remove the # sign, then replace you@yourdomain.com with your actual email address. Use an email that you check regularly – this is where the tool will send alerts.
3. Remove the comment tag from the following entries, so the log file looks as follows:
DOSHashTableSize 3097 DOSPageCount 2 DOSSiteCount 50 DOSPageInterval 1 DOSSiteInterval 1 DOSBlockingPeriod 10 DOSEmailNotify mail@yourdomain.com DOSLogDir "/var/log/apache2/"
4. Save the file and exit. Reload the Apache service by entering the following:
Debian / Ubuntu:
sudo systemctl reload apache2
RedHat / CentOS:
sudo systemctl restart httpd.service
Test mod_evasive
Now, let’s verify the module is working correctly.
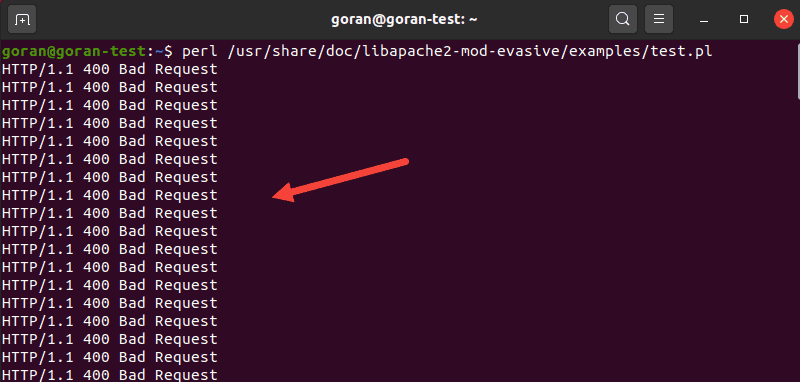
In this example, use the test.pl script to test mod_evasive.
The script is located at: /usr/share/doc/mod_evasive-10.0.1/test.pl
Use the following command to run the script:
perl /usr/share/doc/mod_evasive-10.0.1/test.pl
The output should return this message:
Parameters and Settings
There are many mod_evasive parameters you can configure:
- DOSSystemCommand: First, you may have noticed that this option was left disabled as a comment. This command allows you to specify a system command to be run when an IP address is added to the blacklist. You can use this to launch a command to add an IP address to a firewall or IP filter.
- DOSHashTableSize: Increase this for busier web servers. This configuration allocates space for running the lookup operations. Increasing the size improves the speed at the cost of memory.
- DOSPageCount: The number of requests for an individual page that triggers blacklisting. This is set to 2, which is low (and aggressive) – increase this value to reduce false-positives.
- DOSSiteCount: The total number of requests for the same site by the same IP address. By default, this is set to 50. You can increase to 100 to reduce false-positives.
- DOSPageInterval: Number of seconds for DOSPageCount. By default, this is set to 1 second. That means that if you don’t change it, requesting 2 pages in 1 second will temporarily blacklist an IP address.
- DOSSiteInterval: Similar to DOSPageInterval, this option specifies the number of seconds that DOSSiteCount monitors. By default, this is set to 1 second. That means that if a single IP address requests 50 resources on the same website in a single second, it will be temporarily blacklisted.
- DOSBlockingPeriod: The amount of time an IP address stays on the blacklist. Set to 10 seconds by default, you can change this to any value you like. Increase this value to keep blocked IP addresses in time-out for a more extended period.
- DOSLogDir: By default, this is set to write logs to /var/log/mod_evasive. These logs can be reviewed later to evaluate client behavior.
You can create a new directory to save these apache access logs – make sure you change the owner to Apache, then update the location in this entry:
sudo mkdir /var/log/apache/mod_evasivesudo chown -R apache:apache /var/log/apache/mod_evasivesudo nano /etc/apache2/mods-enabled/evasive.confDOSLogDir "/var/log/apache/mod_evasive"
Whitelisting IP addresses: This option isn’t included in the evasive.conf file by default.
Open the file again for editing, then add the following line:
DOSWhitelist 192.168.0.13 DOSWhitelist 192.168.0.*
Substitute the IP address with the one you want to whitelist. Also, you should list only one entry per line. This is typically used with a trusted client that exchanges a lot of data with your website.
This tool is good at detecting bots and scripts. If there are bots or scripts that you want to allow, you can whitelist them to prevent these bots and scripts from triggering a blacklist action.
Make sure to save the file and exit. Then, reload your Apache service before testing any of these options.
Conclusion
Now you know how to install and configure mod_evasive on Apache.
Between its simplicity to configure and its effectiveness, it has become a favorite tool for protecting Apache and Linux systems. For more information and the manual, please refer to the developer’s GitHub documentation page.
'프로그래밍 > 서버(리눅스,centos)' 카테고리의 다른 글
| Error during SSL Handshake with remote server (0) | 2022.03.03 |
|---|---|
| 리눅스 용량 체크 (0) | 2021.11.07 |
| proxy3 - apm환경에서 node.js ssl 오류 AH00961: HTTPS: failed to enable ssl support for (0) | 2021.09.03 |
| SSL 인증 HTTPS - Let's Encrypt (자동갱신) (1) | 2021.09.02 |
| 아파치 설정 +apm+node.js socket.io (0) | 2021.08.23 |